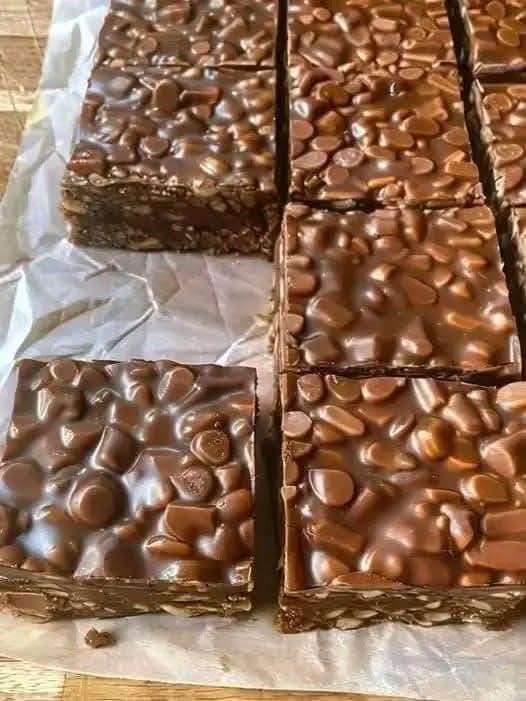
If you’re looking for a sweet treat that’s quick, easy, and irresistibly crunchy, these No-Bake Homemade Crunch Bars are the perfect solution. With layers of chocolate, peanut butter, and crisped rice, they deliver the ultimate combination of creamy, sweet, and crunchy textures—all without turning on the oven. Perfect for dessert, snack time, or even gifting, these bars are guaranteed to be a crowd-pleaser.
Whether you’re a busy parent, a college student, or just someone with a sweet tooth, this recipe is simple enough for anyone to make. Best of all, it uses ingredients you probably already have in your pantry!
Why You’ll Love These Crunch Bars
✔ Quick and Easy
No baking required. You can have these bars ready in under 30 minutes, making them ideal for last-minute treats or spontaneous cravings.
✔ Perfectly Crunchy
Crisped rice cereal gives each bite that satisfying crunch, while the chocolate and peanut butter layers add creamy indulgence.
✔ Customizable
Swap in almond butter, dark chocolate, or even add mini marshmallows, nuts, or caramel for a personalized touch.
✔ Great for Gifting
Wrap them in parchment paper or place them in a decorative tin—they make a sweet, homemade gift that everyone will love.
Ingredients You’ll Need
For the base and filling:
- 2 cups crisped rice cereal
- 1 cup creamy peanut butter (or almond butter)
- ½ cup unsalted butter
- ½ cup honey or light corn syrup
- 1 teaspoon vanilla extract
- ½ teaspoon salt (optional)
For the chocolate topping:
- 1 ½ cups semisweet chocolate chips
- 2 tablespoons peanut butter or coconut oil (to help the chocolate spread smoothly)
Optional add-ins:
- Mini marshmallows
- Chopped nuts (pecans, almonds, or peanuts)
- Sprinkles or crushed candy for decoration
Step-by-Step Instructions
1️⃣ Prepare Your Pan
Line an 8×8 or 9×9-inch square baking pan with parchment paper, leaving a little overhang on the sides. This makes it easy to lift the bars out once they’re set.
2️⃣ Melt the Butter and Peanut Butter
In a medium saucepan, combine the butter, peanut butter, and honey over medium heat. Stir continuously until fully melted and smooth. This forms the sticky, flavorful base that will hold the crisped rice together.
3️⃣ Add Vanilla and Salt
Remove the saucepan from heat and stir in the vanilla extract and salt. These enhance the flavor and balance the sweetness of the honey and chocolate.
4️⃣ Combine with Crisped Rice
Pour the melted mixture over the crisped rice cereal in a large bowl. Use a spatula to fold everything together until all the cereal is coated evenly.
Tip: If you like extra crunch, lightly toast the cereal in the oven for 3–5 minutes before mixing.
5️⃣ Press Into the Pan
Transfer the cereal mixture into the prepared baking pan. Use a spatula or clean hands (lightly greased) to press it firmly and evenly into the pan. Firm pressing ensures your bars hold together when cut.
6️⃣ Prepare the Chocolate Topping
In a microwave-safe bowl, combine the chocolate chips and peanut butter or coconut oil. Microwave in 30-second intervals, stirring each time, until smooth.
7️⃣ Spread the Chocolate
Pour the melted chocolate over the pressed cereal mixture. Use a spatula to spread it evenly over the top. For a fun touch, sprinkle chopped nuts, mini marshmallows, or sprinkles while the chocolate is still soft.
8️⃣ Chill to Set
Place the pan in the refrigerator for at least 1 hour, or until the chocolate has hardened and the bars are firm.
9️⃣ Slice and Serve
Lift the bars from the pan using the parchment overhang. Cut into squares or rectangles with a sharp knife. Store in an airtight container at room temperature or in the fridge for a firmer texture.
Tips for Perfect Crunch Bars
- Press firmly: Don’t skip pressing the cereal mixture into the pan. It ensures the bars hold together when cut.
- Use creamy peanut butter: Chunky varieties work too, but creamy gives a smoother texture.
- Customize toppings: Add layers of caramel, chocolate drizzle, or crushed candy to suit your taste.
- Storage: These bars can be stored for up to a week at room temperature or two weeks in the fridge.
Variations to Try
- Chocolate Lovers: Mix cocoa powder into the cereal base for an extra chocolatey treat.
- Nut-Free: Replace peanut butter with sunflower seed butter.
- Tropical Twist: Add shredded coconut and a drizzle of white chocolate on top.
- Holiday Edition: Use red and green sprinkles for Christmas or orange and black for Halloween.
Serving Suggestions
- Snack Time: Pack them in lunch boxes for a sweet afternoon pick-me-up.
- Dessert: Serve with a scoop of vanilla ice cream for a decadent treat.
- Party Treat: Cut into bite-sized pieces and arrange on a festive platter for gatherings or potlucks.
Why This Recipe Works
The beauty of No-Bake Homemade Crunch Bars lies in their simplicity and versatility. The combination of peanut butter, honey, and crisped rice creates a chewy-crunchy texture that’s hard to resist. The chocolate topping adds indulgence, while optional toppings allow for endless customization.
These bars are perfect for anyone looking for a sweet treat without turning on the oven. They’re quick to make, store well, and satisfy cravings with minimal effort.
Final Thoughts
If you want a sweet, crunchy, and homemade treat without all the fuss, these No-Bake Homemade Crunch Bars are the answer. Perfect for dessert, snacks, or gifting, they’re easy, customizable, and absolutely delicious. Make a batch today and enjoy a satisfying treat that everyone will love!